This recipe for Rhubarb Bars (that’s a tongue-twister, isn’t it?) is a couple of notches more complicated than my usual baking. Honestly, anything that requires getting the food processor out is more complicated than my usual baking! But in this case, I was totally thrilled to try it because it involves rhubarb.
I just love rhubarb. Everything about it. The name, the old-fashioned vibe, the color, the flavor, and how much my father loved it. I’ve always eagerly awaiting its appearance at the supermarket or greenmarket in spring.
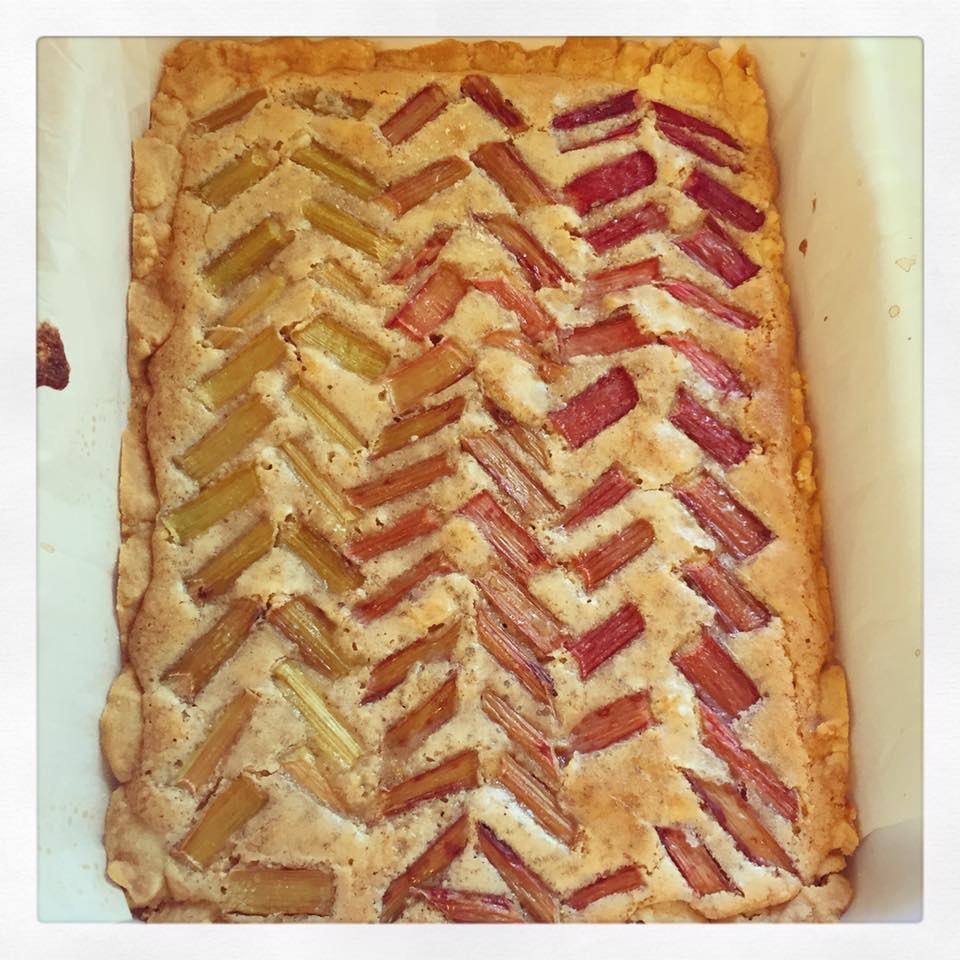
And when I saw this recipe on the fantastic Smitten Kitchen site, I had to try it. The Rhubarb Bars are so pretty and distinctive looking…almost like a work of art, the way the fruit gets sliced and arranged. A far cry from my usual drop cookies!
Making these Rhubarb Bars was a process, but I loved the results. Not your usual pan of brownies….they have a lovely texture, a great mix of flavors (almond and rhubarb), and just look so lovely. Highly recommended for the next time you are having friends over for coffee or heading to a picnic or potluck.
INGREDIENTS
Crust
1 cup all-purpose flour
1/4 teaspoon fine sea or salt
1/4 cup granulated sugar
1/2 cup unsalted butter, cold is fine
Filling
3/4 cup sliced almonds, ideally toasted and cooled
1 tablespoon all-purpose flour
A few pinches of sea salt
6 tablespoons plus 1 teaspoon granulated sugar
5 tablespoons unsalted butter, cold is fine
1 large egg
1/2 teaspoon almond extract, 2 teaspoons brandy or another flavoring of your choice (totally optional)
1/2 pound rhubarb
To Finish
Powdered sugar or 1/4 cup jam of your choice
STEPS
1. Heat oven to 350 degrees F. Cut two 12-inch lengths of parchment paper and trim each to fit the 8-inch width of an 8×8-inch square baking pan. Press it into the bottom and sides of your pan in one direction, then use the second sheet to line the rest of the pan, perpendicular to the first sheet. This is going to make it very easy to remove the bars.
2. Make the crust: Combine the flour, salt and sugar in the bowl of a food processor. Cut the butter into chunks, and add it to the bowl, then run the machine until the mixture forms large clumps — that’s right, just keep running it; it might take 30 seconds to 1 minute for it to come together, but it will. [No food processor? Get the butter to room temperature and beat it with the sugar, then the flour and salt and mix until combined. Chilling it for 15 minutes or so will make it easier to press in.]
3. Transfer the dough to your prepared baking pan and press it evenly across the bottom and 1/4-inch up the sides. Bake for 15 minutes, until very pale golden. For the sake of speed, transfer to a cooling rack in your freezer for 10 to 15 minutes while you prepare the filing.
4. Make the filling: In your food processor bowl (which I never bother cleaning between these steps), grind almonds, 6 tablespoons sugar, flour and salt together until the nuts are powdery. Cut the butter into chunks and add it to the machine. Run the machine until no buttery bits are visible. Add any flavorings and egg, blending until just combined. Spread filling over mostly cooled (warmth is okay but it’s hoped that the freezer will have firmed the base enough that you can spread something over it) crust.
5. Arrange the fruit: Trim rhubarb and cut it half horizontally top to bottom, i.e. like splitting a hamburger bun, with the flatter part on the bottom. Keep tops and bottoms matched/stacked and cut stalks on the diagonal into about 1 1/4-inch lengths. The top and bottom of each segment should nicely “V” together, color side up, in a chevron pattern. If you mostly reach for the more green segments first and the pink-er segments second, you’ll end up with an ombré look on top. Sprinkle fruit with 1 teaspoon granulated sugar.
6. Bake the bars: For 45 to 55 minutes, until they’re golden on top and a toothpick inserted into the almond cream underneath comes out cream-free. The rhubarb pieces are going to move around a little as it bakes so don’t be surprised if the pattern looks a little different when it’s done.
7. Let cool in pan on a rack, or in the fridge, or even in the freezer. You can decorate the bars with a little powdered sugar, or warm some jam and brush it over for a glossier finish. I find it easiest to get very clean cuts when the bars are very cold. A serrated knife, used gently, can ensure the rhubarb stays perfectly put if it’s not cold enough. While bars do not need to be refrigerated if it will just be a day or so, they keep longer chilled.